Sunday, October 19, 2014

Completed trans mount

  Not sure why I named the last post like I did.  I finished the aligning and welding today:


 By splitting this PS plate in the middle, I could gained access to grind a little and avoided having to hit the hole placements perfect:

Weld through primer;  Right when you start to weld you stub out, get a couple burn backs and giant spatter balls, then it settles down and welds fine for the rest of the bead.  That may be due to some other non ideal conditions here, but I suspect the primer as the cause.  That said, it's a relatively minor issue in exchange for rust protection on these inaccessible areas:

Threaded bosses sticking through the rail:

Cap for the end:

I didn't grind these welds down because 1: I didn't bevel the edge prior to welding and the penetration may not be that great, 2: nobody will see them (except all of you!).  Blue and in the corner:

Finally on to something new...

Tuesday, October 14, 2014

DS trans mount complete

Stuff from Eastwood got here a day early:
Least sexy $80 ever spent on my car, but needed for a quality job.  I finished up burning the insulation off the floor with the flap disk.  Turns out once you are burnt into that coating a razor scraps it off pretty clean:


 Primed:

These are ugly welds.  It was really hard to get my head where I could see.  Really hard to get any reasonable gun angle.  Really hard not to burn through, really hard to weld through the primer.  I found I had to set for the 18ga for the edges to have a chance.  Probably should have used the .024 wire.


Turned out nice from below.

We'll see how far the PS goes tomorrow


Monday, October 13, 2014

waiting...

I was thinking about water from the road getting sloshed onto all the bare steel I created in the floor and frame rails.  Before I weld everything up I ordered some weld through primer, some zinc primer, and some seam sealer from Eastwood.  Those are due in Wednesday which is annoying because I could have just driven over to Eastwood and picked them up.

I did some reading about whether I should remove the mill scale before priming.  I have been repeatedly amazed how tenacious mill scale is.  I have always painted over it in the past, and the internet seems to agree that you are better off leaving it on there if you don't care about the appearance of the end product.

Since welding is the next step, I am doing a little cleaning, and also fixing the busted carriage drive on the lathe.  I got to use my new boring bars to make the coupler.  Of course the coupler would have turned out better if I had a functioning carriage drive.

Thursday, October 9, 2014

transmission mount 2...

Bolted the bosses to the cross member and everything lines up

Inside the car.  Have a few pieces to spread the load out and give something thick to weld the metal to.  .135 mild steel.

Have to ground the schmutz off the floor.  Flap disk does take it off, but sort of burnishes / burns it off.  Seems safer then grinding it off or lighting it on fire.  Less messy than acetone.  Looks like the flap disk is the unfortunate win.

Tuesday, October 7, 2014

transmission mount...


I put a heavy bevel on the bushes to make sure they press through the other side of the tube.  I also countersunk the tube to make sure that the weld gets below the surface and seals things up nice.

Since my McMaster order came I could finally tap the mounting bosses.  These were a real pain to tap!  I also lathed the ends down a little.  I want everything to fit easily so nothing is hard over waiting to not go together later.  Welding will ultimately hold everything, so a little room to move now won't hurt anything.  Also, losing the mill scale on the end will make a much better weld.

Squeezy McSqueeze:


 Zap, grind, job done.  Next is to mount the bosses in the floor.


Sunday, October 5, 2014

transmission bracket progress


I decided not to use the bending technique from the other day.  I started laying it out, and just didn't believe that I would be able to lay it out well enough with 4 bends to fit well.  And for something under the middle of the car I choose good fit and ease of fabrication over good looks.

Even so, Figuring out the order to do these many steps to ensure everything goes together took some reasoning.  Here are a couple pieces held in place:


 Here is the result of weld up (fit ended up perfect):

I had decided on 3/8 for the bolts to the floor, but reconsidered and went 7/16-14.  Unfortunately 7/16 is the only bottoming tap in my whole set (odd?) and I can't start the hole.  I don't have the courage to power tap on the lathe yet.  Here are the two holes in the DS floor and the two studs.  I will make a doubler plate out of 1/8 or 3/16 plate and weld it all in once my taps and other bits get here from McMaster:


 Here is the transmission bracket with the center three bushings welded in and ground down and one of the frame rail bushings shown not installed:


Thursday, October 2, 2014

trans mount prep

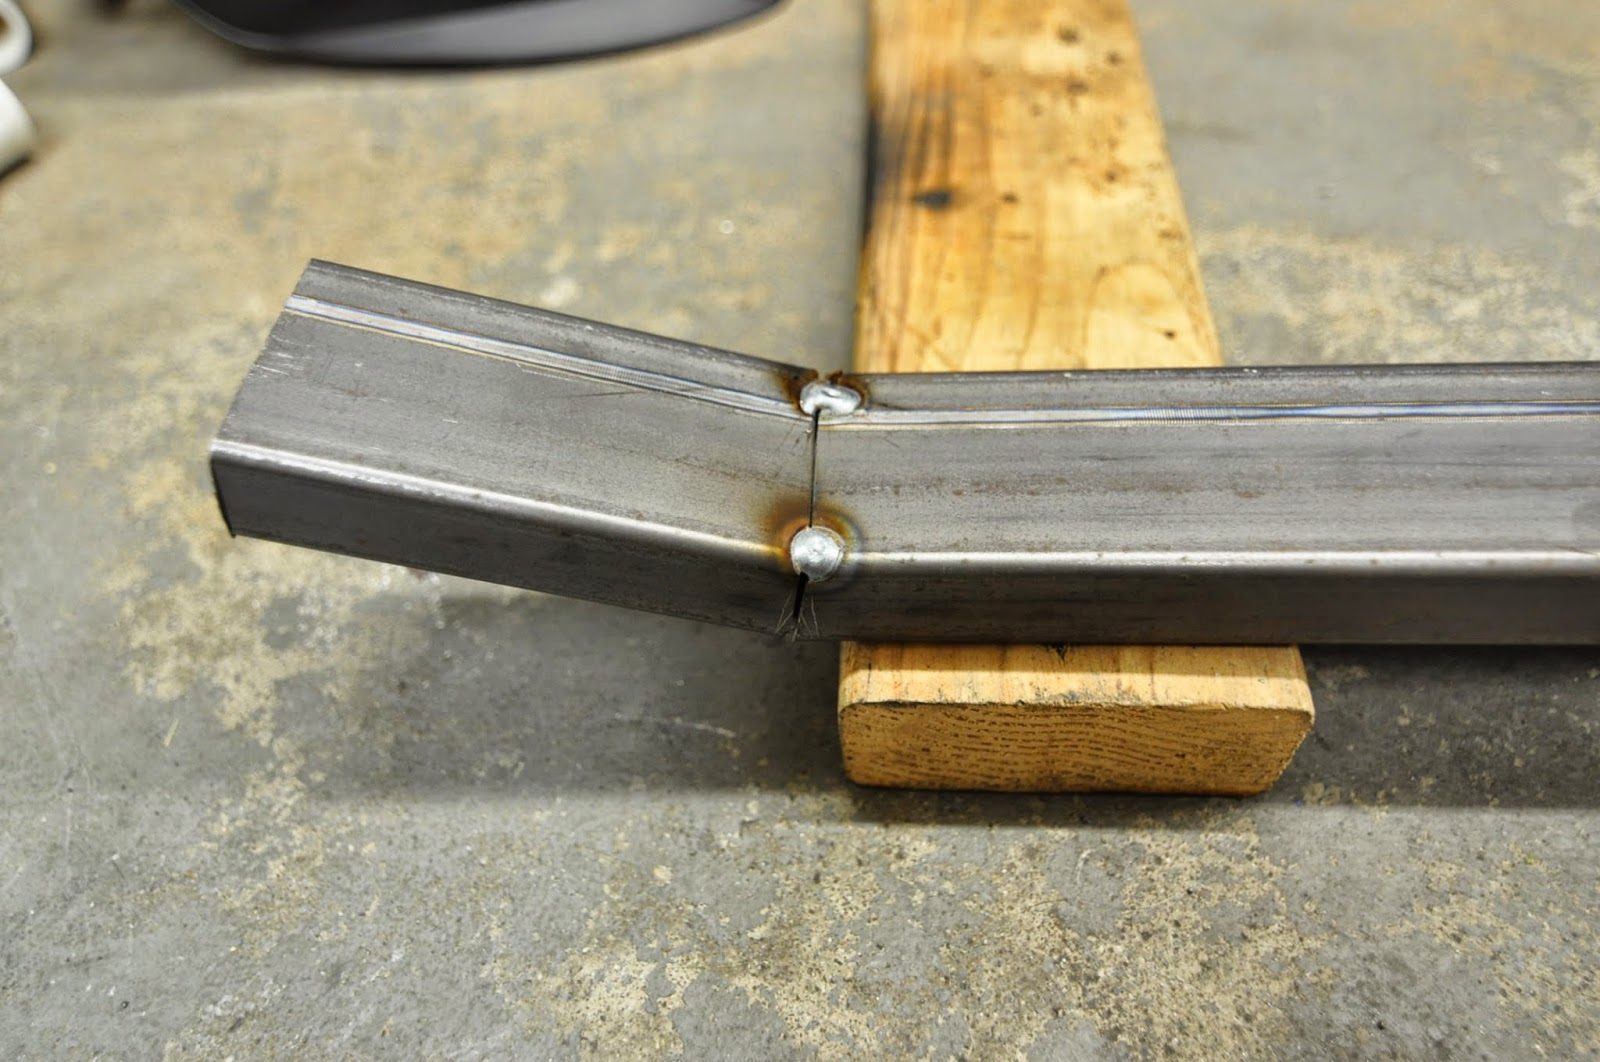
I got my new lathe tooling and got my metal for the transmission mount mount.  I read about a metal tube folding technique to make more natural looking bends in tubing.  I wasn't sure how accurate it would be for what I am trying to do, so I gave it a try:


On the whole I was happy with how it looked, and the angle ended up right on what I was trying to do.  I was worried about doing 4 of these and expecting everything to work out.  One option may be to make all the cuts, bend it close, bolt it into the car, then tack it together there.
 
I also made the first bush for the trans mount today: