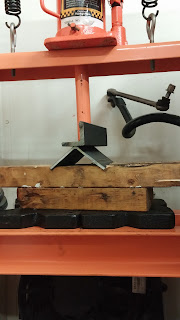
Went to put the bracket in and the control arm wouldn't go in. Normally when I make a clevis, I stick a washer in the stackup to leave a little space. I forgot to do that this time, and when all that welding pulled things in it was a little too narrow. The bracket is really stiff, and took an enormous force to spread even a little. I was planning for hammers and press, or cut pry and reweld. I didn't really like any of these options.
I figured I would try and use the tig torch to bend the bracket. I ran an autogenous weld across the bracket. Below you can see where I ran the torch across next to my previous weld. Although running a large gap would have had a higher heat input, I decided to keep the gap small so that the weld wouldn't look gnarly.
This opened the clevis .020 inch and allowed the arm to install with a few gentle hammer whacks.
Installed!
Friday, February 12, 2016
Thursday, February 11, 2016
PS Lower control arm bracket
First of many brackets to come for the rear suspension:
Bolt on the bracket piece to the control arm and jack into place:
Zap. This was the root pass.
After the second pass:
Bracket back in, transfer punch the hole onto the other side:
Tack in place then, remove bracket assembly again and weld up fully.
I closed up the back. Even though this is a two force member, in roll the bushings will get torqued so I wanted to make sure the bushing moved, not the steel. Also, thought it might help avoid a possible resonance issue.
Bolt on the bracket piece to the control arm and jack into place:
Welded the inside too:
After the second pass:
Drill hole through and bevel. Bolt in place:
Tack in place then, remove bracket assembly again and weld up fully.
I closed up the back. Even though this is a two force member, in roll the bushings will get torqued so I wanted to make sure the bushing moved, not the steel. Also, thought it might help avoid a possible resonance issue.
Tuesday, February 9, 2016
roll bind
Roll bind happens when we don't have enough degrees of freedom for the solid rear axle to roll. In fact the factory mustang suspension would roll bind. Each mustang pivot is a bolt through a bushing which does not allow twisting or lateral movement on the control arms.
Ford got around roll bind two ways that I can see:
1) Very large bushings which have relatively low stiffness to resist pivoting on any axis allowing for lateral flexing
2) Open section control arms which have low twisting stiffness. In fact a friend of mine told me the other day that a while back people began replacing the "flimsy" control arms on mustangs with tubular ones, which resulted in ripping the mounts out of the body.
I have to make the upper control arms for my car and will make them tubular. I suspected that using rod ends instead of bushings would prevent the roll bind issues. My friend suspected that a triangulated 4 bar will still roll bind. I made up a little model out of a broken kid toy and some welding wire:
I found that if I tried to translate the "axle" laterally on of the wires would slacken, indicating that the control arms would resist this motion. They allowed bump, and they seem to allow roll as long as I rotate the axle on its long axis a little to keep the wires tight. Within the limits that I can tell with this crude test, I think I will be alright using rod ends and closed tubes.
Sunday, January 31, 2016
final axle alignment
I am working towards connecting the control arms to the new frame rail brackets. I connected the sway bar so that the tow in on the control arms is set, and tightened down their pivots:
In theory I have to position the axle in 6 degrees of freedom:
3 translation
forward/aft
Left/right
up/down
3 rotation
pitch
roll
yaw
In practice though when I set forward/aft on each side I have covered yaw
When I set up / down on each side I have set roll.
I previously made a jig to set up down and set the axle at ride height so that is covered.
To set left right, I used the distance to the shock tower supports:
To set forward/aft I lined the axle up to be straight below the shock tower, which is the same location as stock:
This just leaves pitch. There is a lot of misinformation about setting the pitch angle. Bottom line is that the pinion angle needs to be parallel to (but not needed to be colinear with) the transmission tail shaft in order to prevent vibration. So if my tail shaft is pitched down 3°, then the pinion should be up 3°. Some may rationalize that it should be slightly less than this since the reaction of the axle under acceleration is to pitch upwards. This seems fine too, especially if you expect to be under high acceleration all the time.
Next step is to set the control arm angle. See figure below:
Figure: Lt blue lines are upper control arms. Red lines are the lower control arms. If we find the points that they would intersect, A and B, then the dotted line represents the roll axis. If that line is down hill as shown then the car will have roll understeer.
So if the lower control arms are pointed in fairly sharply, then they can point upwards a bit since point A is not that high. If the lowers are parallel, then Point A is at infinity, and any upwards angle to the lowers will cause roll oversteer. I measured the angle they form and it was about 10.5° from the centerline. This places their intersection point about 8.5 feet forward of the rear axle which is near the front wheels. I decided that even slightly uphill would lead to roll oversteer since that distance is so far away.
If I assume they are mounted level and look at how much suspension droop is needed before roll oversteer happens it is somewhere just before full droop travel. So I think I am good with level mounting. This will get me no antisquat to the geometry. Everything is a tradeoff. If I don't like how it turns out, it is a simple procedure to cut off the bracket clevis tabs and put new ones on. Tht is the upside of making them myself.
When I got the axle aligned and put the lower arms in place they were inboard to the point that they won't attach to my new bracket as is:
In other builds I looked at they fit. I am expecting either people used the SN95 axle which is wider, they use rod ends which are narrower and allow changing the angle relative to centerline, or they just force these outwards. I don't want to force them as it will wear out bushings faster, potentially cause some roll bind, and likely uncenter my axle, so I am going to build onto the brackets a little. I am putting together an order for this material, and the material for the custom upper control arms. This is getting long so I will cut this off here.
Thursday, January 28, 2016
DS suspension bracket
Finished the drivers side. Fits like a glove:
For now I will keep these so they can be removed. That way I can tack the brackets to hold the axle in exactly the right spot, then pull the brackets off the car and weld them properly. Later I will add holes to plug weld these on permanently. 1/2 inch grade 8 bolts + weld may be overkill. But this is one of those things that is absolutely not allowed to break. Looking at the stock control arms and the connection at the axle makes me feel good that I won't have any problems.
Thursday, January 7, 2016
suspension bracket
Finished welding up the PS bracket to hold the rear suspension. This bracket is critical to safety. If it fails then I would instantly lose control of the car. To attach it, I will bolt through the frame rail in 3 places, weld the forward and aft edges, and rosette weld it in a number of extra places.
Here is the bracket with the bolts:
I like the air drills for drilling on cars. They have enough power to get it done, and they are light and cheap. Feels real solid so far.
Monday, December 21, 2015
control arm brackets part 1
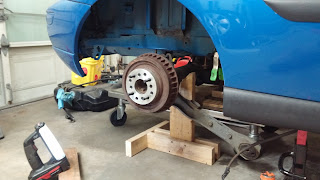
Started on the control arm brackets. I made a stand to hold the axle at ride height and in the right place. I hacked up some 3/16 box to wrap the frame rail.
Here are the first two pieces of steel:
The frame rails aren't perfect 90° angles so I used my bracket stretching trick from the front rails:
Close up passenger outside after stretching:
Passenger inside pieces after stretching:
After tacking together with the mig I went prime time and did my first welds that will matter with the tig. I am happy with them. Most of my practice was with .062 thick material. This 3/16 was easier to weld. I also have some new electrodes that seem to make the arc easier to control. I did these at 160 amps, which felt a little low.
Subscribe to:
Posts (Atom)


