Saturday, August 9, 2014

subframe mount start

Stretched the bracket open with the shop press today at my neighbor's urging.  I made a little template so I knew I had the right angle without running back and forth to the car:


Stretchy.


 Worked great:

Did the bottom one and welded them together:

Then I added this bottom cuff to bolt the bracket to the frame rail flange.  I curved the bottom piece in the press by just pressing the middle into a 2X4. It ended up matching pretty close.


Thursday, August 7, 2014

steering planning

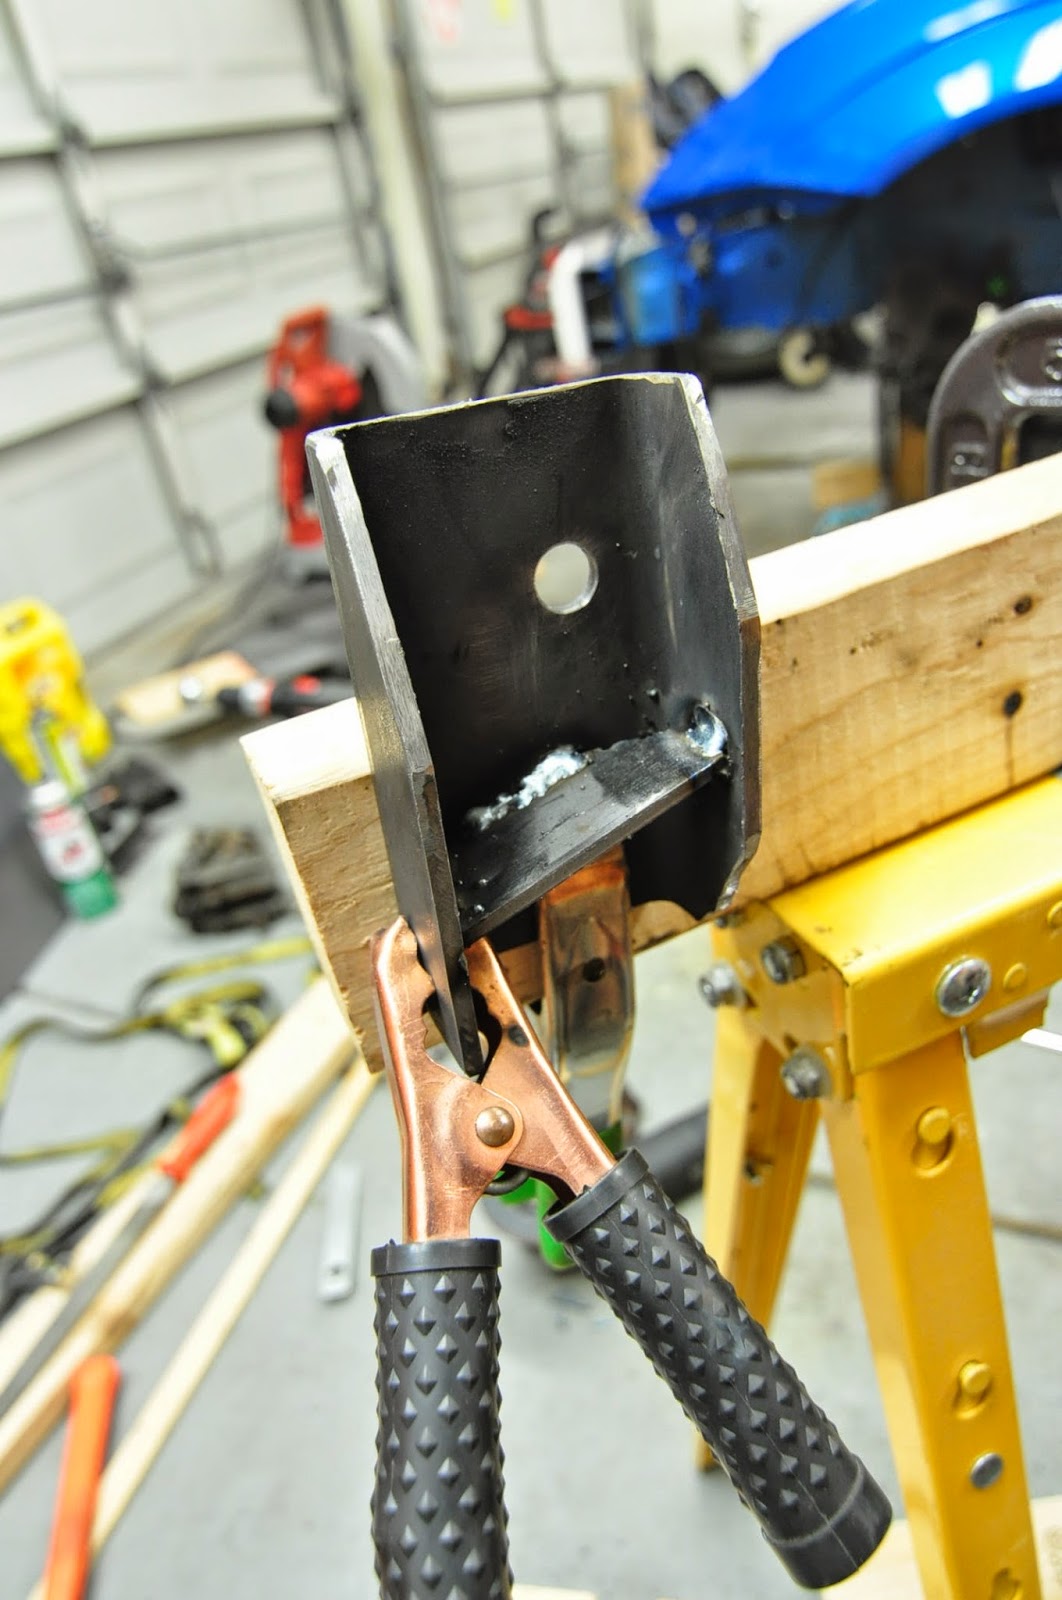
I am planning to heat the corner of that subframe bracket up red hot and stretch it open to the angle I need with an adjustable wrench.  I want to see how that works before I cut the other 7 brackets.

In the meantime I started planning out the steering.  At the front I have the splined front steer mustang rack. Steering systems for projects like this are pieced together using u-joints and what are called a DD shafts.  I started looking at the right place to break into the focus column to mate the DD shaft with my focus column.

This image shows what would be under the dash:
I started by looking at the top u joint in this image.  It can't really be separated without ruining it.

The accordion thing below that I think is what collapses or bends in a wreck so that you aren't impaled.  I would like to retain that feature.

Below that is a rod that moves in and out of the accordion thingy freely for about 2 inches of travel.  I think this is for tilt steer, but also to accommodate for a little bit of chassis flex that could change the distance of the steering system.  A rigid system would put large stresses on the u joints when things flex.  On older systems I suspect this function was provided by the rag joint:

(rag joint taken from the mustang.  The rubber disk flexes to act like a u joint, and, I think, to absorb a little axial movement)


Below that rod is another inseparable u joint

Below that are some metal pieces that are formed into each other.

If you were looking for a good place to splice in and didn't catch one, neither did I.  I really don't want to go welding around in there.  I know forces are low, and a weld should be plenty strong.  But I just watched "Senna" like 4 times in the last 6 months.  The guys at Williams are certainly better at welding steering columns than me...

I looked at the Focus rack to see what I had left behind:


The end of that looks a bit like a DD shaft.  Foolish indulgent thoughts, right?  Metric focus.  English DD shaft...  but, I do have a lathe if they are close...

Bottom line:  The bottom of the last piece on the column is EXACTLY the right size to receive a 0.75 inch DD shaft and its flats.  Should need no lathing.  As long as I can snake around things in the engine compartment and interior, everything should plug together end to end with no modification.  Thanks Ford!


Tuesday, August 5, 2014

subframe mount kickoff

I did not have a solid plan I liked for the subframe mounts until today.  A few ideas without a home suddenly came together in my head and I decided to get started.

May the swarf be with you!:

I got really smooth plasma drags today.  Left an awesome edge on each side of this angle cut from a box:

Crud.  Why did I expect either the rail or the bracket to be 90°:

To thick to beat with a hammer.  Wrong direction to squeeze in a vice.  I have some ideas.  Hopefully one of them is a good idea...


Saturday, August 2, 2014

Blue and in the corner by the time I get back

That was what my advisor told me once of a material rack he wanted me to design and build while he was away.  At that time I was really underprepared to be designing or making pretty much anything.  I did not complete the assignment in time.  I remember all this because what he told me when he got back turned out to be the best advice I have ever gotten and something that I recently passed on to someone who needed it.  He told me that it is very easy to roughly design something; It is going to be this big and go there.  That scale of effort isn't worth anything to anyone.  Everything is in the little details that need to be thoughtfully attended to.

I have seen this come up over and over again in my short career.  When I have intentionally focused on all the little details it has ALWAYS made a huge difference in everything.  It makes minor and major projects alike go so much more smoothly and it is the difference between really impressing people and amateur hour.

Only reason I chucked that all out there now is that "blue and in the corner" is what these mounts ended up being:  Painted the DS:

 Passenger side mount gusset

I noticed a sort of centipede appearance to many of my welds that I am sure was from my zigzag motion being a little too big for the travel speed.  I switched to a swirling motion and it really helped smoothed them out.

Once again pulled out a good one when it mattered.  Again like golf I sort of practiced the motion and speed ahead of time once before spraying metal.

 Blue and in the corner.  Let's hope it stays there!  It's well rook for your engine to fall out.

Friday, August 1, 2014

engine mount #1 done

As some of you know I nearly broke my arm with a 2x4 that got spun by the drill press a couple weeks back.  I bought a vice to prevent the drill press from finishing the job.  The unexpected benefit was that now I have a free hand to spray oil while cutting and it goes much quicker now with less heat.

 fit up:

Weld prep.  I learned to not use flap disks except for very light duty like scale removal.  Otherwise you smoke through them at $5 each.

Gusset added:

Tacks at this angle were very tricky to pull off:

 First weld that does something important (holds the engine in the car).  Great that I got a good one.

Ready to clean, paint and install.